As an analysis of the world’s “beauty arenas” has shown, beauty standards have not changed in recent years, but, fortunately, the right approach has emerged – naturalness. Thus, a doctor of aesthetic medicine must, in addition to professional skills, have a sense of harmony. In addition, impeccable knowledge of facial anatomy is very important for the doctor, since corrections are made in areas where the most important nerves and arteries are located closely.
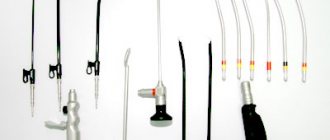
The most commonly used cannula techniques for volumetric restoration in contouring significantly expand the possibilities of anti-aging correction.
In his report “Injection management: algorithms for restoring the middle third of the face,” Maxim Andreevich Krasnoselskikh, maxillofacial plastic surgeon, chief physician at Clinic Esthetic (St. Petersburg), presented clinical algorithms for the harmonious assessment of the “age face” and proposed correction techniques.
Features of working with the upper third of the person
One of the standard markings when working on the upper third of the face is a line from the corner of the nose to the tragus of the ear. Many people use this marking, which indicates that above this line we can work at different levels (from periosteal to intradermal injection), and below - only at superficial levels, we do not go deep under the skin.
There are dangerous zones in the orbital area: a centimeter in the area of the medial corner of the eye (the exit point of the artery), the infraorbital nerve combined with the vessels, the exit of the sensory nerve.
The area is very prone to swelling, so pay attention to the amount of filler injected. As a rule, I do not recommend injecting more than 1 ml into the nasolacrimal groove and premalar area in one session. Very often the filler causes compression of the lymphatic drainage pathways, and then we end up with a patient with edema.
I’ll tell you a little more about the depth of filler injection in the area of the upper and lower bony edge of the orbit. Be sure to use the SOOF and ROOF layers (these are fat packets located along the upper and lower bony edge of the orbit), take into account the ratio between these layers of fatty tissue. They are located under the orbicularis oculi muscle. That is, any injection of filler over the orbicularis oculi muscle risks that the filler will become contoured and some unevenness will arise. SOOF is the target layer in this regard. It is located above the periosteum.
If we consider the layer-by-layer structure of fat packets in the orbital area, the most superficial is the malar fat packet (it is located subcutaneously), then under the orbicularis oculi muscle - SOOF, the same target packet into which we introduce fillers to restore volume, and orbital fatty tissue, which can only be removed surgically during blepharoplasty.
ROLE OF REFERENCE ZONES IN PRESERVING YOUTH OF THE FACE
The intensive development of cosmetology as a practical medical specialty undoubtedly requires a great immersion in the anatomical and functional features of aesthetic correction zones. Being at the intersection with plastic surgery, cosmetology has long made a significant step in increasing the complexity of techniques, with which the predicted results and risks of minimally invasive intervention have become almost comparable.
We know very well the “dangerous” zones or areas of “doubtful” correction and work with them quite carefully. This helps to avoid possible undesirable consequences associated with the anatomical feature of a particular area. But at the same time, it is important to have a clear understanding of the topography of “advantageous” anatomical structures, which, if worked correctly, most techniques, whether hardware or injection, will give a good visible effect. The success of the result is largely determined by the correct choice of the patient, the material and the accuracy of its placement in the tissue. Especially if the question concerns thread lifting, when it is necessary to meet the patient’s expectations from a difficult procedure and get the maximum effect from it. The leading role in this is played by the ligamentous system of the skin (transverse connective tissue structures), which connects the superficial and deep muscular aponeurotic systems (SMAS and DMAS) to each other. There are: 1. True ligaments - strong structures that are attached to the bone; 2. False ligaments are rather fragile formations and have points of fixation to the fascia of the facial muscles. True ligaments: orbital, zygomatic, buccomaxillary, mandibular. False ligaments: platysmo-auricular, masticatory-cutaneous. Their functional role is to limit the displacement of the soft tissues of the face that occurs with age. It is obvious that as a result of muscle activity and gravitational ptosis, the ligamentous apparatus is weakened and stretched and, as a result, a change in the contours of the face. The key to successful work in thread lifting is working with tissues at their non-displaceable points or “fixation points,” the so-called reference points.
An absolutely classic version of the anatomy of these main areas: ocular (1), zygomatic (2), chewing (3), mandibular (mental (4)) - Fig. 1. They limit the displacement of the soft tissues of the face, which occurs with age, in the places of their attachment. Depressions appear above the ligaments, and the sagging tissues form the appearance of folds, for example, the “painting bag” - above the zygomatic ligament, the “jowl” - above the mandibular ligament. In the example, the work carried out on the model: as you can see, age-related changes are represented by excessive redistribution of subcutaneous fat in the area of the middle and lower third of the face, nasolabial folds, “puppet” wrinkles, a smoothed chin-chin angle, and the contour of the lower jaw are pronounced. Using the threadlifting method with 4D threads on a cannula with spirally arranged notches, we get good results using even a small number of threads through the points of least tissue displacement. The atraumatic structure of the instrument allows for correction with minimal damage and a short rehabilitation period. Taking into account the excess of subcutaneous tissue and the severity of gravitational ptosis, it is possible to further strengthen fixation at reference points using hardware methods, skin redermalization procedures, and reinforcement with linear 3D mesothreads along the periphery of the face.
The same anatomical landmarks (facial reference points) are used when carrying out a variety of aesthetic procedures in order to obtain a lifting effect: when performing surgical interventions; when carrying out vector lifting procedures with preparations based on hyaluronic acid, calcium hydroxyapatite, for working with both smooth threads and threads with notches; when carrying out hardware lifting with focused ultrasound or radio wave method. It is a good knowledge of the anatomy and main reference areas of the face that makes the work as effective and safe as possible.
Basics of Safe Operation - Access Points
Relatively safe areas for working with needles and cannulas are the area of the body of the zygomatic bone, where the zygomatic bone is not covered by muscles, as well as the angle of the lower jaw, the zygomatic arch of the body of the zygomatic bone and the lowest palpable pole of the bone as one of the options for performing an access point when working on middle third of the face.
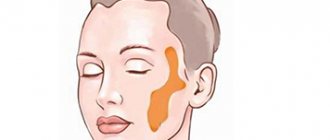
If you need specific guidelines for restoring volume in the zygomatic area, there are several interesting markings. One of them is called the “golden proportion”, when you mark the middle third of the face between the level of the wings of the nose and the level of the eyebrows.
Another technique for assessing the face is the Wilkinson technique, which has long been used to determine the placement of permanent zygomatic implants, and then migrated to contouring. If you work with bolus techniques, you can draw a plumb line from the lateral corner of the eye, divide this distance into three parts, and between the upper third and lower two thirds you get the most advantageous point for increasing the projection of the zygomatic zone.
Another technique - marking is carried out from the lateral corner of the eye to the commissure of the mouth, this line is divided into three parts, and the border of the upper third is also one of the most advantageous points for increasing the volume of the area above the zygomatic bone, if you work with the technique of vertical injections.
How McGregor pulls himself up
Are pull-ups necessary for a mixed martial arts fighter? Undoubtedly! Pull-ups develop back muscles, strengthen joints and ligaments, and create a corset for the spine. In addition, pull-ups are an energy-consuming exercise that, in combination with other exercises, will make your figure lean and sculpted. Based on this, pull-ups are relevant in mixed martial arts, because they create a powerful base (form the upper body) for performing strikes, throws, and techniques.
Conor's goal is to develop his arm muscles with pull-ups. To do this, the athlete brings his elbows as close to each other as possible. We are talking about pull-ups with neutral hand placement. The amplitude during the exercise is maximum. According to the fighter himself, this method of execution also loads the inner chest and helps with the block when you protect the body.
Facial assessment technique
If you superimpose all the methods for finding the most advantageous injection point on top of each other, it becomes clear why at the moment the most popular marking is the Hinderer method. That is, all these points practically fall into exactly the zone that Hinderer identified back in 1960 as the most advantageous zone for the permanent placement of zygomatic implants. This technique is an oval inscribed in the upper outer quadrant, which is created by lines drawn from the lateral corner of the eye to the commissure of the mouth and from the tragus of the ear to the wing of the nose.
There are several recommendations for working in these techniques: it is performed from both the upper and lower injections. The upper injection is approximately the anatomical middle of the upper zygomatic arch, and the lower injection is at the intersection of Hinderer's lines.
If you use additional markings in the form of an oval, you can safely work with both a needle and a cannula, and place the drug as close as possible to the bone in the form of small portions of approximately 0.1 ml.
Another technique is linear retrograde injection, marking is carried out according to Hinderer, the injection is made from a point in the middle of the upper zygomatic arch, the upper vector is directed to the wing of the nose, the lower vector is directed to the commissure of the mouth, and two vectors in the middle - to create additional volume. The drug is injected as close as possible to the surface of the zygomatic bone so that it has support under it and gives good volume. If you do not go beyond the boundaries of the marking, then you do not lose volume, and the drug does not remain in the soft tissues, where it does not have bone support.
The dense preparation is injected approximately 0.25 ml from the upper access. If you use the lower approach, the same thing: four vectors, the injection point at the intersection of Hinderer’s lines, the drug is injected in a volume of 1 ml in several movements, linearly retrograde.
If you make these markings, you get the opportunity to bypass the zygomatic-facial nerve, and your preparation is located strictly in the projection of the zygomatic bone.
One of the famous facial markings is the marking according to M. Landau (five stars). Today it has received a small new interpretation in the form of a cannula injection: if you work with injections and make five injections, evenly spaced along the base of a small triangle, then inject 0.4 ml into the central point, 0.2 into the adjacent ones and 0.1 ml - to the extreme points. If you work with a cannula, then from one injection you place the drug along the Landau line, 0.1-0.2 ml at a time. The technique is very effective.
Triangles of youth
A young face, regardless of its shape, is a triangle, pointing downwards, and the base of the triangle runs along the line of the forehead. As we age and age-related changes appear, this triangle gradually blurs, transforms and slides, and on an older face it is already turned upside down at the level of the cheeks, and the bottom of the triangle runs along the bottom of the oval of the face.
In some of our patients, this picture was observed at a young age due to genetic and anthropometric characteristics.
This age triangle is further enhanced by emerging age-related disadvantages:
- nasolabial folds and tear troughs,
- lines of grief,
- drooping corners of the mouth,
- shaved,
- double chin and heavy lower face.
We can say that the face turns into a Christmas tree, the branches of which look down . No one experiences joy from such a tree, unlike the New Year's tree.
It is these “branches” that cosmetologists who want to rejuvenate the patient’s face will have to fight.
Procedures
In aesthetic medicine, there is quite a lot of controversy about the order in which to eliminate age-related manifestations: from the general [oval of the face] to the specific [specific wrinkles] or vice versa. And when to do hardware procedures, if they are needed to give your face a youthful appearance.
Firstly, we strongly recommend doing all hardware procedures BEFORE correction of fillers or botulinum therapy.
After hardware procedures, we recommend to patients an approach from the specific to the general - firstly, it’s cheaper, and secondly, the changes are gradual and you won’t have to shock others!
But “where exactly should I start?”, “what age-related deficiencies highlight age more?” — everyone answers these questions for themselves, everyone has their own priorities.
