Facial contouring is a makeup technique that allows you to advantageously emphasize your strengths and hide your shortcomings (for example, highlight the bridge of your nose and cheekbones, bring the line of your cheek or jaw into shadow). Contouring is mainly needed to give relief and additional volume to facial features. With the help of contouring, proportions and features visually change. This is done by changing shades: adding darker or, conversely, lighter tones.
What you need for facial contouring
Among the cosmetics used to correct facial proportions, the most commonly used are the following:
- Powder. It matches your skin tone and cannot be lighter or darker. Apply on top of makeup base.
- Bronzer. Allows you to give the skin a light tan shade and hide the painful color.
- Highlighter. Necessary for highlighting certain areas.
- Blush. Applied last. For light skin, use cool tones of blush, and for dark skin, use warm tones.
Common Mistakes
Sculpting the face (step-by-step photos cannot reflect all the details and subtleties of the technique) can occur with errors.
The most common of them are:
- Inability to model a face in accordance with individual characteristics. Contouring is not intended for drawing a new face. This technique only allows you to adjust facial features so as to highlight your strengths and darken your flaws. Don't lose your individuality.
- Incorrect placement of light highlights, which disrupts the harmony of makeup. You should not apply highlighter all over your face or large areas, as it is intended only for placing light accents and does not serve as a replacement for powder.
- The absence of blush on the face makes it not alive. Don't limit yourself to just contouring powder and highlighter. It is necessary to complement your makeup with bronzing blush, matched to your skin color.
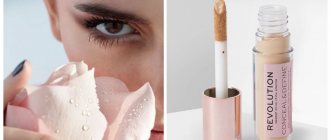
- Improperly preparing your skin for contouring can ruin your entire makeup. It is imperative to use the base. If this is not enough to even out the surface of the skin, you can apply foundation or BB cream.
- Using the wrong colors creates dirty spots on your face. You should not choose a contouring product that is too warm red or dark gray. It is better to mix warm and cool tones, and choose the color based on your skin tone. You should also avoid products with yellow tint.
- Insufficient shading of lines leads to imbalanced proportions, making facial features look unnaturally narrow or wide.
If you have problems with shading, you should use a quality brush. You shouldn’t put a lot of product on it, and it’s also important to shake off any excess.
Preparing for proper facial contouring for beginners
Even an experienced specialist may not succeed with contouring if the face is not prepared correctly, let alone facial contouring for beginners. To do this you need to go through several steps:
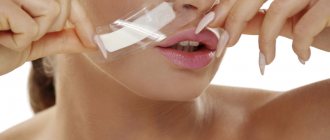
- Cleansing. Remains of cosmetics are washed off with lotion, foam or oil. Even if there is no makeup on your face, you should not ignore this point, since the skin still contains the smallest impurities and sebum.
- Toning. After washing, wipe the skin with a sponge soaked in tonic. This will refresh your face and prepare it for further procedures.
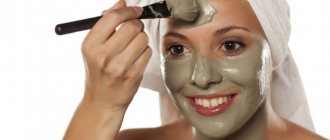
- Hydration. Any type of dermis needs moisture. There is rarely enough fluid entering the body. Therefore, after toner, apply a good moisturizer to your face.
- Toning. Now you can start applying makeup. First of all, it is recommended to apply a makeup base or primer.
Textures
To decide on the choice of texture, it is recommended to familiarize yourself with the features of each of them and the scheme for its application.
Dry
In structure and appearance they resemble eye shadows. The production of these products occurs by pressing minerals and pigment together. Dry textures provide the most natural makeup possible due to the fact that they are applied in the thinnest, almost imperceptible layer.
It is better to use special brushes to apply them. If they are absent, your fingertips will come to the rescue.
Cream
Characterized by a dense texture. The cosmetics last for a long time, but only with careful blending. If you shade the product poorly, you will get the effect of not light shadows, but rather rough stripes. A sponge or hard brush is most suitable for distribution.
Liquid
The texture is reminiscent of foundation. To properly apply liquid contouring products, just remember the rules for applying foundation. You need to squeeze a small amount of product onto a thick brush or sponge and distribute it with gentle, but pressing movements. The effect is natural and lasting.
Friable
They are considered professional contouring products. This proportion correction product comes in the form of a regular pigmented powder that is not pre-mixed with any binders. This texture allows the artist to independently choose the degree of saturation of the product when applying it.
Choosing a sculpting product
Sculpting products are available in various textures:
- Dry sculpting blushes and powders are best suited for everyday contouring. The light dry texture falls on the skin like a thin veil, creating a natural shadow.
- Cream products are used for shooting in front of the camera. Thanks to the rich texture and vibrant hues, color does not disappear through the lens. This texture is not suitable for everyday makeup. In real life, she clearly stands out and looks unnatural.
Applying and blending cream contouring products is difficult, so it is not recommended to do so without the skills of a makeup artist.
- Sculpting products in sticks have a delicate and light creamy texture. Thanks to this, they create a natural shadow that is easy to shade. The sticks have a moisturizing effect and are therefore suitable for dry skin. Unlike powder, they do not emphasize flaking.
Only matte products are suitable for facial modeling. The tone can be either warm or cold. Makeup artists recommend combining both tones to create a natural shadow without red or gray. Sculpting palettes that combine several shades are designed for this.
When choosing a color, take into account your natural skin tone. The contouring product should be 1 to 2 shades darker.
Sculpting Tools
Contouring is done step by step and each step requires a different tool.
Beveled brush
Great for applying dry cosmetic products. It is most convenient to apply cosmetics under the cheekbone. Provides even coverage and blending. Suitable for loose or dry bronzer.
Sponge
Designed for perfect blending of both creamy and dry textures. Helps create soft, blurred boundaries, making makeup look more natural.
Cosmetics can be smeared over areas of the face with a sponge or driven in with light taps.
Kabuki
This is a densely packed, large brush. It can be used to distribute loose products over the face and body. Used to distribute blush and powder. Also suitable for contouring the décolleté area.
Suitable for blending any texture.
Fan brush
It is considered a multifunctional tool. It helps remove excess powder or shadow. It can also be used to easily apply bronzer and blur the line of blush, ensuring even distribution of highlighter.
Small flat brush
Convenient for highlighting or darkening small areas of the face: the tip of the nose, corners of the lips or eyes.
Moisturizing and dry correction: differences
The difference lies in the decorative means used to make the makeup. They can have a dry or creamy texture. The former are most often used for everyday life. This palette will highlight the features you want to focus on and hide problem areas. The tone will be light and dim.
Oily correctors will help create a dense coating and change your appearance almost beyond recognition. Makeup applied with such a product may be too visible in daylight. It is perfect for an evening look or a photo shoot.
Contouring based on skull shapes
Circle
To visually narrow the face (make it thinner), it is recommended to darken the area near the temples, the lower part of the chins and the line below the cheekbones.
On the contrary, it is better to highlight the back and tip of the nose, forehead, as well as the protruding part of the chin. It is important to note that the face should not be shiny, like a greasy pancake.
Square
The makeup artist's task is to slightly reduce the chin. To do this, a dark outline is drawn on the sides of the lower jaw. You also need to sharpen your cheekbones; for this, a sculptor is applied along the cheekbones and the corners of the forehead are darkened.
A highlighter will help highlight the central part of the face.
Triangle
Contouring is necessary to smooth the forehead and visually widen the chin. This is done by darkening the protrusions of the cheekbones and temporal lobe.
The side areas of the chin are highlighted with a highlighter.
Oval
The main task is to visually reduce the forehead area. To do this, the hairline is slightly darkened. The forehead is also narrowed by darkening the temples.
How to properly apply contouring to your face
Makeup artists share the secrets of correctly applying contouring to the face:
- The first step is shading. It is important to thoroughly shade all applied pigment. Otherwise, there is a high risk of going out in public with rough stripes all over your face, which will have nothing to do with the effect of a light shadow.
- Look for original uses. Most cosmetics can be used for a variety of purposes. Brown eyeshadow can be used as a concealer, and highlighter can be used as a shimmer eyeshadow.
- You can contour your entire body. Not too long ago, a trend spread among fashionistas to contour their chest line or abs. When applied correctly, the result is a very natural effect.
Tips from makeup artists
Professional tips to help you achieve perfect makeup:
- Before applying contouring products, you need to carefully look at the reflection of your face in the mirror. You will need to imagine an oval in place of your own face. What goes beyond his features must be obscured.
- If difficulties arise with visual presentation, a face chart will help. It can be purchased at any makeup store. The face chart shows different types of faces so that the makeup artist can apply makeup and see how it will look on one type or another.
- It is important to lighten a small area under the cheekbones - the hollow, which is noticeable when you turn your head. This will prevent your cheekbones from becoming too sunken and prevent your face from looking sallow.
- It is easier to control the precision of highlighter application with a thin and flat brush. Afterwards, the application area must be shaded with a contouring brush. This way you will be able to correctly arrange the highlights, avoiding going overboard with the highlighter.
- For evening makeup or shooting in front of a camera, you need to use a dry texture of a contouring product on top of a cream one.
This way you will be able to achieve the most expressive effect, and your makeup will become more durable.
How to do facial contouring
We will describe a step-by-step scheme for performing facial contouring, which is suitable even for beginners.
Step 1. Preparation
This stage involves properly moisturizing the skin and applying foundation, hiding problem areas with the help of a concealer.
Step 2. Eyes
- Apply concealer under the lower eyelid in the shape of an inverted triangle.
- For close-set eyes, use a highlighter to place a dot in the inner corner of the eyes.
- Also, a highlighter dot is placed in the middle of the upper eyelid (the resulting highlight will provide additional volume to the eyes).
Step 3. Cheekbones
- Darken the area along the line of the cheekbone (its beginning can be found by retracting the cheeks).
- It is highly not recommended to apply a dark line that is too wide.
- Makeup should not extend beyond the line running from the hairline to the tangent to the outer part of the eye.
Step 4. Nose
For the nose, it is recommended to choose a flat brush. The sides of the nose are necessarily darkened and the back is highlighted. To make the nose visually shorter, it is recommended to slightly darken its tip.
Step 5: Lips
Highlighter applied to the top of the lip will make it look more voluminous. And a highlighter line drawn along the edge of the upper lip will correct the difference between lip volumes.